By Jason Shron
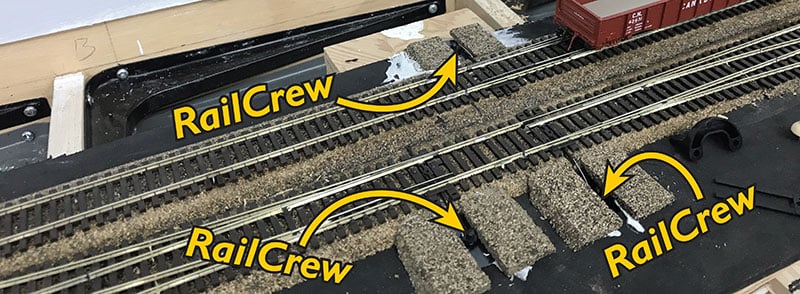
Can you see my RailCrew?
I've been installing a lot of RailCrew Switch Machines on my layout - The Kingston Sub - and here are some of my tips based on experience. I recommend that you read the instructions first - whether you've installed one yet or not - just to get an idea of what is involved. As you progress, you'll probably find ways to refine your installation methods. If you have anything else to add, please feel free to contact us and offer up some tips.
Tip no. 1
Definitely use a spade bit. Leave the hole saw bits in your workshop. I use a 1 1/8" spade bit I picked up from Home Depot and have had no problems.
Tip no. 2
I always start by installing the throwbar in the cam hole farthest from the centre of the cam. I only use the straight throwbar. (It looks like a shallow upside-down U.)
Tip no. 3
While installing the machine and adjusting its rotation and vertical position relative to your track, have a live hot glue gun handy. As soon as you've found the sweet spot, squirt a dab of hot glue between the machine and the hole edge from underneath (if possible). This will hold it in position for your testing. If you later need to adjust it, slice through the hot glue with an X-Acto knife.
Tip no. 4
Make up a testing unit before you wire anything up. I used the jury-rigged power supply and switch from our installation video (click here to watch it).. Once the machine is installed but not yet wired, attach the white plug from the machine to the terminal strip and give it some juice. Throw the points back and forth using the toggle and make sure they throw all the way. When the switch machine is operating properly you will hear a sharp click from the machine with each throw. If you only hear the sharp click when throwing in one direction, it means that you need to change the cam hole to the one closest to the centre of the cam. If you don't hear that sharp click, the points may be aligned correctly but your frog polarity will not change. I learned this the hard way - I ripped out a machine thinking it was faulty but in fact I had just used the wrong cam hole.
Tip no. 5
It will be much easier for you later on if you lower the top of the switch machine during installation so that the surface of the machine is below the top of your subroadbed. This makes covering your machine for scenery or to support your headblock ties much easier.
Tip no. 6
When wiring up the machine, don't solder anything until you've tested the frog polarity. Depending on which way the machine is oriented when you install it, the frog polarity could be correct or it could be opposite. You have a 50/50 chance of getting it right, so that means you'll most likely get it wrong. I made the mistake several times of soldering everything up with heat shrink and then discovering that I got the polarity wrong. I now test with finger-twisted wires before soldering and heat shrinking.
Tip no. 7
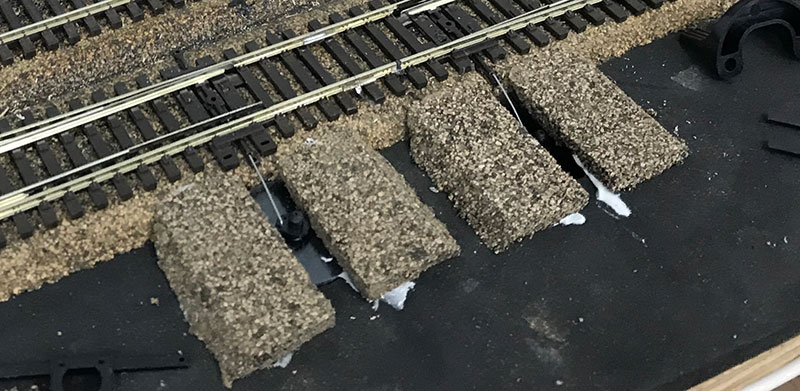
The two adjusting bumpy things on the top of the machine get in the way of scenery. Once your machine is installed and working flawlessly, use flush cutters to take them off. I use cork roadbed sanded to key onto the side of the track roadbed and I just cover the machine except for the hole for the switch stand. See photo below.

Once the scenery is in and the decorative switch motors in place (These are CTC-controlled switches, so the provided switch stands won't be used here), then you'll never be able to see them! A pair of beauty goals, eh?
General Problems and Inquiries
If your RailCrew product arrives damaged or there is any other issue - missing parts, missing instructions, etc - the best thing to do is to call our support team. They take care of all of our warranty repairs and they are all swell guys. The toll-free number is 1-855-LRC-6917 (1-855-572-6917) (outside North America, + 1 905-474-3314 or 905-474-3324). You can also submit an email using ourcontact page too.


