Do NOT use MRC 1300-series DC controllers with any of Rapido's locomotives. The RailPower 1300 is notorious for voltage spikes and it WILL destroy your locomotive. There is no “if” about it. We will try to help you if we have the parts, but we are not responsible for locomotive damage due to voltage spikes in your power supply. As well, we will not repair any locomotive damaged by an MRC 1300-series controller (or any other "train set" DC controller) unless you have retired the controller. Otherwise the damage will soon reoccur. “Train set” DC controllers should not be used with any modern model locomotives.
Non-Sound Models
After listening to feedback from purchasers of our DC/DCC/Silent N Scale GMD-1, we decided to leave the decoder out of the non-sound N Scale FL9. We initially advertised this model as having a factory-installed dual-model DC/DCC decoder but this information is now incorrect. Inside the packaging for the N Scale FL9 is a voucher that can be redeemed for a dual-model DC/DCC decoder by return of post. If you have bought a non-sound N Scale FL9 and are wondering why it doesn't work on DCC then it is because you need to ask us to send you the decoder! We are very sorry for any inconvenience that this may have caused purchasers of this model.
Decoder installation in DC/Silent models
Every DC/Silent N Scale FL9 is packaged with a voucher for DCC users that wish to upgrade their model with a free Digitrax six-pin dual-mode decoder. This is simple to install and requires only a screwdriver and something soft on which to rest your model. We recommend a foam locomotive cradle. The installation process is outlined below. Please click the images for the hi-res versions.
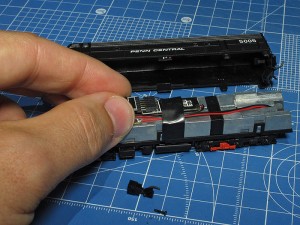
1/ With your model upside down in a foam cradle, remove the front coupler using a small (jeweller's size) Phillips screwdriver. You do not need to remove the rear coupler.
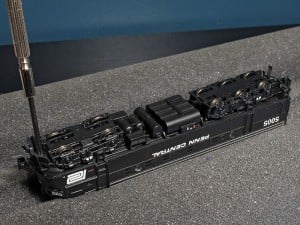
2/ Gently remove the shell by pulling the two sides of the body away from the chassis and lifting the chassis up from the nose end.
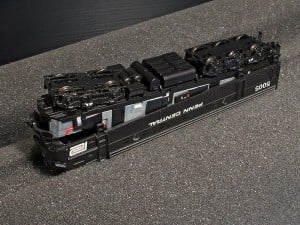
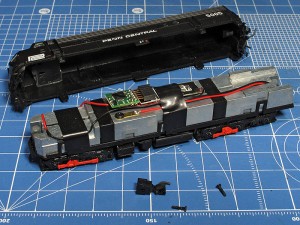
3/ The DC/Silent FL9 model has a six-pin dummy plug installed in the socket on the PCB.
4/ Gently pull the dummy plug out from the socket. You may need to press down on the socket.
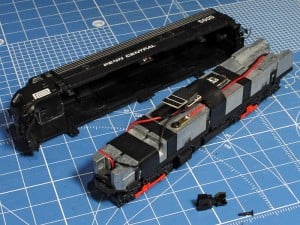
5/ This is the six-pin dual-mode decoder.
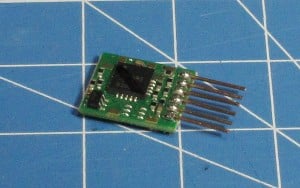
6/ The pins on the decoder are longer than those on our dummy plug. This is normal. Gently push the decoder into the six-pin socket being careful not to bend the pins.
7/ Put the body back on the chassis and press the shell down, inserting the rear of the chassis first, until the body is in its correct place.
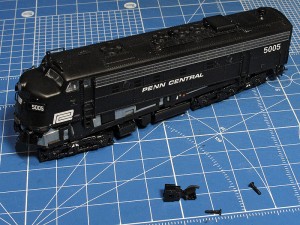
8/ Screw the front coupler back in place. You're now ready to enjoy your Rapido Trains Inc. DCC/Silent EMD FL9.
If you have any problems with the decoder installation process, please do not hesitate to drop us a line and we will help you out.
General Problems and Inquiries
If your model arrives with damage or there is any other issue, the best thing to do is to call our support team. They take care of all of our warranty repairs and they are all swell guys. The toll-free number is 1-855-LRC-6917 (1-855-572-6917) (outside North America, + 1 905-474-3314 or 905-474-3324).
Notes Regarding Our N EMD FL9
Your FL9 was tested at the factory on a Kato Unitrack layout, including through turnouts. It should have no problem handling Unitrack turnouts and 11" radius curves. Some brands of track (especially code 55) are notoriously fiddly. We can't guarantee that your FL9 will handle all brands of track and turnouts. If your FL9 shorts on your turnouts, we recommend playing with the wheelset spacing to find the "sweet spot" for your turnouts. We do not offer this service for you but information on how to adjust the wheelset spacing can be found in the Support section of our web site.
Rear/Backup Light
The lighting on the N scale FL9 is not directional. F0 activates the front headlight, regardless of direction of travel. The rear light is only lit in switching mode, which is activated by pressing F12.
Parts Diagram
To view the files, you will need Adobe Reader. Click below to get it. ![]()